Friday, February 16, 2018

Service Now & Order Now Integration


Business Requirement: All the users should able to raise a request for New PC or PC Refresh through Service Now. Service Now should able to send all the 'PC Refresh' Request related information to 'OrderNow' using SOAP API
OrderNow should able to invoke 'ServiceNow' via SOAP API to update any PO related information for the respective 'ServiceNow' Request

What is OrderNow?

The Order Now platform is a tool to procure the item that is ordered/requested by an organization for official uses. The Order now platform initiates the request submitted and generated invoices. Its integration with ServiceNow provides a leverage to an organization where ServiceNow can be centrally used to place a request in the service now platform and an order are initiated in OrderNow. The order can be tracked and notification to the requestor can be configured in ServiceNow that are triggered by the request status updation.

- Configured all the related modules such as SOAP Request, Variable Sets, Notifications, Order Guides into one single application called 'PC Refresh' as shown below

As the integration of ServiceNow and Order Now is a custom integration, this module needs to be configured. Search for Application Menu in the application navigator and click new to create the application menu.

Search for PC in navigation filter and you will be landed on the PC refresh - integration.
The Order guide, soap message, variable set, notification related to this integration can be found in their respective section.


- PC Refresh Categories : 

PC Refresh categories define the CIs depending upon their name and usage by different users.
 User are differentiated on basis of skill set that is contained in custom table cmn_skill
The same categorization can be found in the asset as well and can be configured in accordance with the ecosystem.


- Order Guide: Created an Order guide to submits a single service catalog request that generates several items.

The order guide that will actually place the order in the Order now the environment is named PC refresh. All the configuration related to it can be found here. The items that can be ordered by this order guides are mentioned in the rule base.

- SOAP Message - Created a SOAP Message to communicate with 'OrderNow' system as shown below


The three soap messages configured can be found in this section. These soap messages will be called in the workflow to populate the argument with the information placed in the variables of the PC refresh. Primarily the send order soap message is used to place the order and the screenshot below of the workflow shows the soap script called. The activity is highlighted 


Below is how workflow has configured.


The run script activity is populating the arguments sent to order now and error coming while placing the request can be rectified from here only. The below screenshot shows the SOAP services being called in the workflow. 

Order send the response in service now on the RITM created after a few minutes of its creation.
We need to provide the full address and information of where the order is to be delivered. Any field with empty value will result in error that is logged in the activity section of the RITM

Order Now Updates Service Now Using SOAP

When the order is successfully placed in OrderNow, the PO number generated in OrderNow is fetched back in ServiceNow with some other information (Shipment Date, Shipment Address, tracking number, carrier name) and is updated on the same request created in ServiceNow. This is done via a scripted SOAP message where these parameters are defined and are mapped to their respective fields on the request in ServiceNow. Below is the screenshot of the soap message


Thursday, February 15, 2018

Service Now Beginners Workshop Assignments


---------------------------------------------------------------------------------------------------
                                                      SECTION 1 Business Rules

--------------------------------------------------------------------------------------------------
- Create a table called 'incident_temp' with below two fields
      Incident Number
      Short Description

- Create a business rule, this should execute only whenever any new incident created on 'Incident' table, 
             - Create a new record in 'incident_temp' table from above newly created Incident record and set Incident Number and short description values and save the record in 'incident_temp' table


Assignment # 2

- Create a business rule 'Remove Temp Incident  Rule' , This should execute only whenever any record removed from 'Incident' table.
             - Query the incident number from 'incident_temp' table based on removed Incident Number record from 'Incident' table
             - Remove the corresponding incident record from 'Incident_temp' table


Assignment # 3
 - Create a business rule called ' Update Temp Incident Rule' - This should execute only whenever any incident updated in 'Incident' table.

      - Update the corresponding incident in 'Incident_temp' table and update Short description.


---------------------------------------------------------------------------------------------------
                                                      TRANSFORMATION MAPS
--------------------------------------------------------------------------------------------------
Assignment # 1

- Customize 'Group'(sys_user_group) Form by adding a new field called 'Parent Group' and reference this field to Groups table (sys_user_group)

- Export all the existing groups from sys_user_group table into CSV file.
- Update the CSV file 'Parent Group' field with any random existing group 
- Upload the updated CSV file into sys_user_group , and map ONLY newly updated 'Parent Group' field using Transformation Map
- After successful upload, Open any Group record and verify 'Parent Group' field is populated correctly as per the CSV file.


---------------------------------------------------------------------------------------------------
                                                      SECTION 
--------------------------------------------------------------------------------------------------

1.)Create an excel spreadsheet with 6 columns and consisting of data up to 20 records.By using import operation in service now go ahead and load data into ServiceNow with Import set option.

2.) Write down the list of steps to be performed in order to import any user from an LDAP Server.

3.) Create one of header menu and footer menu in a page using CMS features under ServiceNow.

4.) Create one of UI Page with a feature to go ahead and ask the user to enter a username?

5.) Create a new table to store information of employees (With five fields at least) and generate a child table (Employee department) we should have relations ship between employee and employee department?

6.) Define navigation steps to go ahead and view
Business Service map diagram with CI Items.

7.) List out at least one Glide record and access data from that Glide Record.

8.) Design code to go ahead and count records with Glide Aggregate.

9.) With one of example go ahead and perform manipulating of form with Glide Form.

10.) Define the difference between metrics and SLA?
-----------------------------------------------------------------------
                                                 SECTION 2
----------------------------------------------------------------------
1.)Go ahead and define the related list of any records you want at the bottom of the form.(For example, A simple
defined related list may be placed on the room from that
lists other rooms on the same floor).
Related lists appear on forms and show records in tables that have relationships to the current record.
Users can view and modify information in related lists like any other list.

2.)Go ahead and 2 different columns in one of the existing user tables.Consider any datatype for newly added fields.
 created two different types of data fields, Time/date and True/False.

3.) Define navigation steps to identify dictionary of any table in ServiceNow.

Navigater->Tables->Select required table from the table->Right click on the bar->Select configure->Click on Dictionary.

4.) Create a report with one of bar graph and export that a generated report in jpg format.

5.) What are steps to be followed to deliver an e-mail when any of record is being updated in respective object or table?
Navigate to System Notification -> Email -> Notifications. Select the name and Table.Select the filer condition when to send, who will receive and What will contain.then submit and run


-----------------------------------------------------------------------
                                                 SECTION 3
----------------------------------------------------------------------

Service Catalog Assignment 1


-----------------------------------------------------------------------
                                                 SECTION 4 SLA
----------------------------------------------------------------------


1. Create an SLA the on the incident table for priority 1( i.e high) duration should be 30 mins and 1 day for both types listed below with without schedule.

Responsive: Should start when incident active is true and assignment group is your group (select a group of your own), stop when assign to is not empty and pause when on hold.

Resolution: Should start when incident active is true and assignment group is your group (select a group of your own), stop when the state is resolve and pause when on hold.


2. Create an SLA the on the incident table for priority 4  duration should be 4 hours and  5 days for both types listed below with schedule.
Schedule should be mon to Fri 9:00 am to 5:00pm

Responsive: Should start when incident active is true and assignment group is your group (select a group of your own), stop when assign to is not empty and pause when on hold.

Resolution: Should start when incident active is true and assignment group is your group (select a group of your own), stop when the state is resolve and pause when on hold.
(observe the change on weekend)


3. The SLA should stop on public holidays how can this be achieved?


4. Create an SLA the on the incident table for priority 1 duration should be 30 mins and 1 day for both types listed below with schedule.

Schedule should be mon to Fri 9:00 am to 5:00pm

Responsive: Should start when incident active is true and assignment group is your group (select a group of your own), stop when assign to is not empty and pause when on hold.

Resolution: Should start when incident active is true and assignment group is your group (select a group of your own), stop when the state is resolve and pause when on hold.

When SLA has reached 50% breach notification should go to assign the to person,  assign to person manager and assignment groups manager.


5. Create an SLA report for the incident and mention those records for which SLA has breached for a particular assign them to the person of that assignment group.


-----------------------------------------------------------------------
                                                 SECTION 5 Form Customizations
----------------------------------------------------------------------


1. Create an application called “NeedIT” it should be visible to ITIL users.

2. The application should have a table call “NeedIT” custom table

3. Fields are as follows:

        - Number String
- impact same as the incident
- urgency same as the incident
        - Priority Choice list same as incident
        - Requested For Reference
        - What needed  Choice list Notepad ++, Clarity and CoreDB.
        - When needed  Date/Time
        - State Choice list
        - Assignment Group
        - Assign to Users according to the assignment group
        - Short Description String
        - Description String
        - Additional

4. There must be a related list which gives all the active incident of the mentioned “Requested For” user.

5. Number field must be read-only, Priority should depend on impact and urgency, State should read only

6. Make 3 sections in the form
             - Title: Note It includes field Worknotes and Additional comments.
             - Related time (fields to add Opened and closed both field type as date and time)
             - Close notes (closure details make mandatory when close button is clicked in the form)

7. State value will be New, Work In Progress, Pending, resolve and closed state values to be managed by buttons.

8. Work In Progress button won’t be visible when the ticket is about to be created.
After creation of a record, the button should be visible. Only the assignment group member can see the button work In progress.

9. When the ticket is in work in progress state then pending and resolve should appear and make work notes as mandatory when changing the status to pending. and when it is placed in pending it can be again placed in progress state.


10. When resolve additional comments field should be mandatory, there should be a button to put the status back in progress.


11. After resolve, there should be a button of close. 

-----------------------------------------------------------------------
                                                 SECTION 6 ORDER GUIDE
----------------------------------------------------------------------


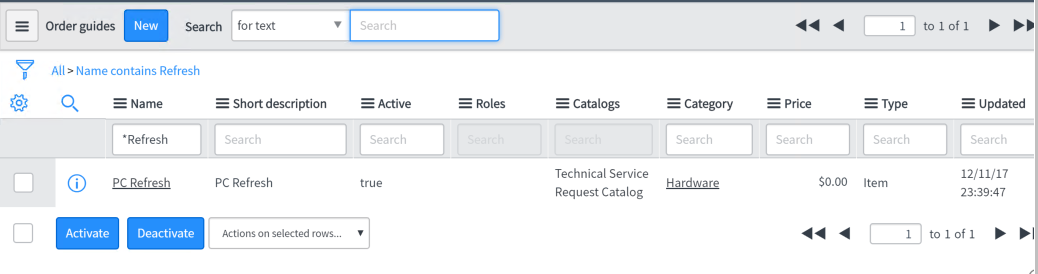
1.  Create an order guide
Name Software Request.

2.    Variables required as follows
-          Requested by (Auto-populated by login user)
-          Requested for (User reference)
-          Location (Auto-populated according to requested by region(read - only))
-          Location of requested for (Populated according to a request for the user (read-only) if requested for changes location also changes.)
-          Software required (drop down) - Notepad ++, Clarity, Visual Studio, Pulse secure.
If Notepad++ selected one field to show one field “Version” – drop-down
-          The version has 2 values in drop down Older, Latest.
3     Catalog items need to be created.
4      For rule base, if software required = Notepad++ then that catalog item should be displayed.

5     Make Notepad++ catalog item mandatory. 

-----------------------------------------------------------------------
                                                 SECTION 7 RECORD PRODUCER
----------------------------------------------------------------------


1      Create record producer should be linked to change request.

2    Variables are as follows:
-          Type (Standard)
-          Short Description
-          Description

These variables should be linked to change request table. The value entered in record producer of this variables should be reflected in the change request record.

3     Create a workflow, whenever a type is Standard approval should go requested by manager.

    Approved- It should go to scheduled state. If rejected – it should go to canceled state.

5      After Schedule, it should go to Implement state.

6    When the state is in “Review” it should only wait for 3 days, after that it should get automatically closed. With close code = Automatically closed and close notes = Review not completed. 


7   In close code include one more option (Automatically closed)


-----------------------------------------------------------------------
                                           SECTION 7 REPORTS
----------------------------------------------------------------------


1. Create a report on incident table fields number, caller, state , priority assignment group and assign to share it with group service desk. Service desk users should be able to modify this report.

2. In the same report make the color changes for priority.
     1 = Red
     2 = Yellow
     3 = Green
     4 = Blue
     5 = Grey
3. Get a report of all the incident opened last moth of priority 3 and 4.

4. Add the report of point 1 with all the changes from point 1 and 2 in a dashboard.
That dashboard should be editable to 3 users of your choice.


5.  Create a report on change table of type Emergency where there is NOT a related Incident or Problem


-----------------------------------------------------------------------
                                     SECTION 8 REST API

----------------------------------------------------------------------
1.        Why Rest is used? Read about it.

2.        Retrieve all the change records from REST API explore. What is it called?

3.        Create an incident record from REST API. What is it called?

4.        Retrieve the same incident record?

5.        Modify the same incident record by adding short description?


6.        Delete the same incident record and also a change record of your choice?

7. Read about all the REST methods and calls.

-----------------------------------------------------------------------
                                     SECTION 9 Web Services
----------------------------------------------------------------------

Assignment # 1

Create an outbound SOAP Web Service on Indicent table with following four operations

i. create Indicent() 
Input Parameters: Short Description, Assignment Group
Output Result - After successful creation of an incident in service now, send out Incident number back.

ii. updateIncident()
Input Parameters: Incident Number, Short Description
Output Result - After successful update in Service Now, Send '100 - Successfully Updated', If any failure occurs 
send '200 - Failure to update Incident'
iii. getIncidentInfo()
Input Parameters: Incident Number
Response: Based on given incident number, return with 'Short Description', 'Created By' values.

iv. removeIncident()
Input Parameters : Incident Number
Response: Based on given incident number, remove the incident in Service Now. Upon successful deletion send

  '100 - Successfully Removed' otherwise '200- Failure to remove the Incident'

v. Create an Update set and capture all the above functionality
vi. Use Soap UI tool to test all the above operations.
vii. Prepare a document with all the testing screenshots and any development functionality related screenshots.


Assignment # 2

Create an outbound REST Web Service on Indicent table with following four operations

i. create Indicent() 
Input Parameters: Short Description, Assignment Group
Output Result - After successful creation of an incident in service now, send out Incident number back.

ii. updateIncident()
Input Parameters: Incident Number, Short Description
Output Result - After successful update in Service Now, Send '100 - Successfully Updated', If any failure occurs 
send '200 - Failure to update Incident'
iii. getIncidentInfo()
Input Parameters: Incident Number
Response: Based on given incident number, return with 'Short Description', 'Created By' values.

iv. removeIncident()
Input Parameters :  Incident Number
Response: Based on given incident number, remove the incident in Service Now. Upon successful deletion send

  '100 - Successfully Removed' otherwise '200- Failure to remove the Incident'


v. Create an Update set and capture all the above functionality
vi. Use Soap UI tool to test all the above operations.
vii. Prepare a document with all the testing screenshots and any development functionality related screenshots.

Wednesday, February 7, 2018

Service Now - JIRA Integration


Steps to Integrate JIRA with ServiceNow:
     1. Install the JIRA integration POC update set in the instance by going to Retrieved Update Set and then importing XML.

 2. Under JIRA Application, click on Settings. Enable the Jira Integration, enter JIRA URL, Credentials and Project Key.


s
        3. Create a field in JIRA called: “ServiceNow ID” under Issues.

        4. Get the ID of that custom field through this link

               5. Check the integration from ServiceNow to JIRA by creating an incident with Category as “Jira”
               6. For inbound integration select “Pull Data” and add intervals & identifier as required:


7. Test the Inbound integration too.